Most people these days are very conscious of the huge volume of plastics floating around in our oceans and the impact this is having on the fish and mammals that live in the Ocean and the planet as a whole.
Here in New Zealand we are undergoing an anti-plastic revolution. Things like straws and plastic bags in shops are on the way out and while they aren’t quite illegal yet, you certainly get the feeling that people are tut-tutting behind your back if you happen to forget your re-usuable bags.
So in the interests of saving the world one bit of cling-wrap at a time, and inspired by my friend Joanne’s pics of her home made Beeswax food wraps on Facebook I decided I had to get myself some.
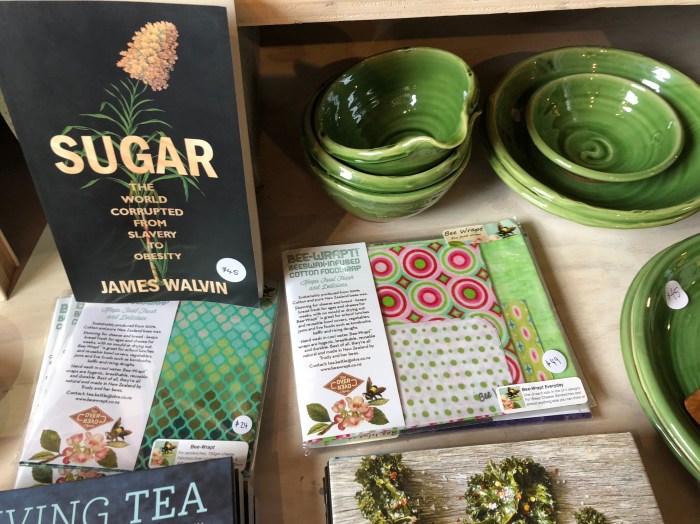
A couple of days later I stopped at a little art gallery and there on the shelf was a packet of these wraps – for sale for a whopping $49 for a pack of three!
Joanne had made her own. “How hard can it be?!” I chuckled to myself as I went online and purchased a block of beeswax from Dee’s Bees.
While I waited for my package to arrive, I headed off to the shops to buy some fabric. Dee from Dee’s Bees recommends lightweight pure cotton as it holds the wax well, it breathes, doesn’t hold odours, it is cheap to buy and comes in lots of great colours. You simply wash them to re-use them and they last for ages. When your wrap does eventually wear out you can also compost it!

Dee was right about the great colours! It was so hard to choose and at just $7.50 a metre I decided to get four different colours in 30cm lengths each.
I came home and my parcel of beeswax was sitting on the doorstep – great timing! I threw the cotton in to the washing machine and when it came out and dried, I cut up my fabric in to 28cm ish squares and put the oven on.
Dee’s beeswax came with some great instructions, and I did actually sit down and read them.

She recommended using a vegetable peeler to slice the beeswax up and then you lay the slices on to the fabric and put it in the oven (on a pre-prepared baking tray with baking paper on it)
My first attempt came out as a bit of fabric with big waxy splotches on it… 😦
Dees instructions did warn of this so I put some more beeswax on. It seemed to take forever to melt and so I ended up putting a layer of fabric and a layer of shaved wax one on top of the other. But they were still looking splotchy. Heaps of wax in one spot and none in the next.
Its funny that after 43 years I am still learning things about myself. I am eternally optimistic, and generally think that things look really easy and quick to do. I also don’t really like following instructions to the last detail – generally preferring to just muddle along and it will all come together.
As with many projects I start, I soon realise that the job is going to take quite a lot longer than I expected, I haven’t got some of the things I need to complete the project, it is way more difficult and that carefully following the instructions from the outset would have been a better idea.
Will I ever learn?
I decided to get the iron out of the cupboard – an alternative method mentioned in the instructions.
Yes I do actually own an iron, however I couldn’t tell you the last time I used it. We live in a world of crinkly sheets and shirts around my house, and I am quite happy with that. Life is too short to wear flat clothing in my opinion.
I put some baking paper on the iron, then laid my layers of fabric and wax on to the ironing board and another layer of baking paper on top and then got the iron on to the whole lot. A bit of pressure seemed to work, but the wax was oozing out the sides and on to the ironing board, so I then decided to iron in the baking tray…

This actually worked quite well! But the novelty of ironing soon wore off, so I turned the oven up a bit more, sliced up some more wax and fabric layers and put the whole lot back in the oven again.
By this stage my kitchen was beginning to look a bit like a disaster zone. I was covered in wax, so was the iron, baking tray, ironing boards, chopping boards, vegetable peelers and knives too. There appeared to be wax smoothly coating many items in the kitchen except for my damn fabric!
The $49 for the pack of three wraps was now starting to look like an absolute bargain!
In the end I grated the whole block of wax and then squashed it all down as it was melting, and in the end – perfection!
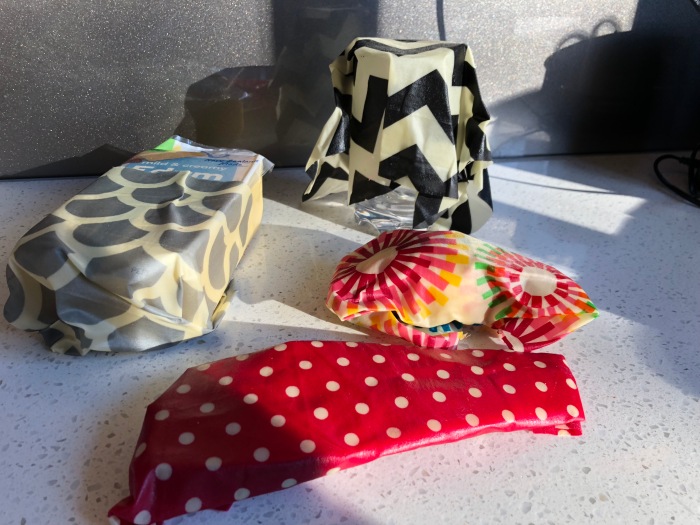
If I was going to do it again I think I’d choose fabric without any white in it – as the white has all gone a bit yellow with the wax, but it looks ok – just not as white as when I started. I made all mine the same size – 28cm x 28cm which looks small when you are cutting it out but is actually quite big when you are wrapping up a lemon. (not sure that I’d ever really wrap a lemon – but I had to wrap something for the pic..)
They make great colourful gifts too! (Hey family – guess what you are getting for Christmas?!)
Anyway it was lots of fun and if I can do it then anyone can!
If you are based in New Zealand then Dee’s Bees is a supplier of wax, and has pre-made wraps to purchase too, but don’t send any bee, wax or honey products from overseas in to New Zealand as they’ll be seized at the border.


I jumped on the anti-plastic bandwagon after I saw that horrible video of the sea turtle having a straw removed from his nostril. It pains me to think about it. Ugh! Good on ya for trying the beeswax wraps idea, Viki. You’ve got more patience than I do. I use a product made in New Zealand called Sistema. They come in lots of sizes and keep leftovers fresh, good for packing a sandwich, and easy to wash. BPA and phylate free too. I love your country!
LikeLiked by 1 person
Thanks Diane!
Yes I’ve got a bit of a Sistema addiction! Great stuff.
LikeLike
Pingback: Measuring Microplastics | Astrolabe Sailing
I believe every effort helps. I enjoy your optimism. Being idealistic can be a curse also I have found, but the big picture tells me that it is always right. Thanks!!
LikeLiked by 1 person
Pingback: Gift Ideas for Sailors | Astrolabe Sailing